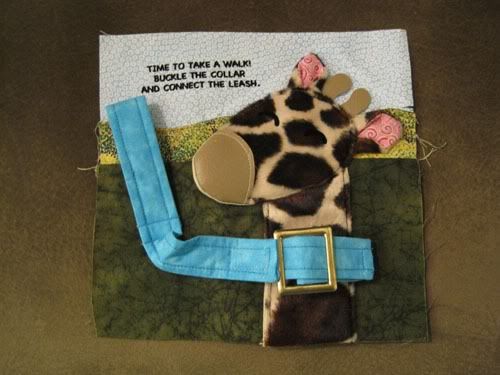
To take take advantage of the task of "buckling" I present our pet giraffe.
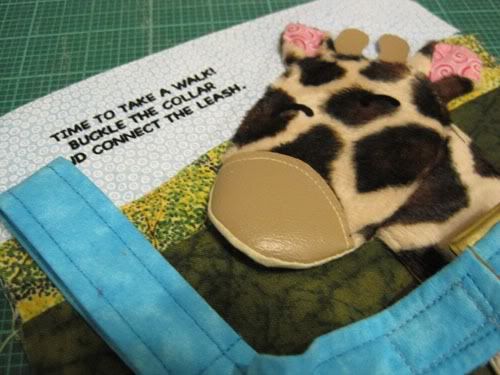
The activity here is that our little giraffe wants to stretch his legs, so naturally we need to put a collar on and leash him up to take him on a stroll. A few things to note here: I purposely did not use proper hardware. I use a slide buckle instead of a buckle with a tongue and no clip attachment for the leash. A, they're a choking hazard, and B, this hardware is often used for really important things (like a real collar with a dog's ID tags) so I didn't want to teach the kid how to create a dangerous situation. I chose a giraffe because the long neck worked the best with my page, but I've done this with dogs too. The recipient of this book isn't a "dog" person so I took the opportunity to not be obvious.
This is another simple single page, though it can get a little unwieldy with topstitching many layers. Just take your time and pin like you've never pinned before. Your sewing machine may complain, and when mine does that I just go one stitch at a time. I generally avoid making my machine mad as it just goes bananas when it can't get through something. As with the last post, I won't go into explicit detail on how I do some parts because I've already explained it. Just remember that I use the same method as the bento box here. I should note that the brevity of this post is partly due to me running into my deadline (as I alluded to in the first post in this series). And, I sewed this page after being out working in the Temple the night before, getting up early to work a full day, going to school for four hours, and then coming home to a mess. Apologies now for the lousy pictures :)
I don't have to get up quite so early tomorrow, but this is my last night to sew so I moved the mess cleaned up my house and I'm going to finish this now!
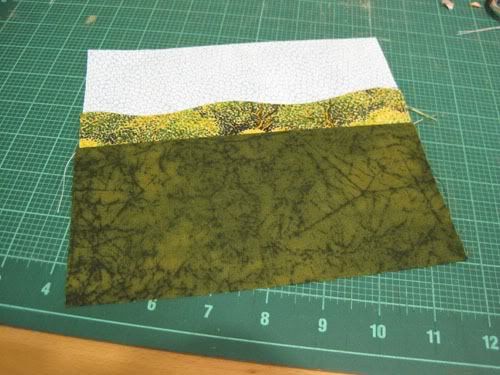
To begin, assemble your background from the pattern. I created the scrub in the background by drawing a pattern on the backside of my tree material, facing it to a backing, and then sewing. Trim, turn, press, and topstitch. Same idea as the camping page.
Using the pattern pieces, create your giraffe pieces. Turn and press. I used outdoor vinyl for the muzzle and horns because my fabric store didn't carry a lighter weight vinyl material. Use whatever you want here (I was actually going to use corduroy for a while). The advantage of the vinyl is that you don't have to finish any edges on the horns. My method for making the ears should be clear - I just faced the giraffe fabric onto pink, sewed, turned, and pressed. I folded the sides in to the center point as I inserted them under the head. They are not actually attached to the head in any way (merely slipped under and held by topstitching), but you can sew them into the head if you like. Pin this well and set aside.

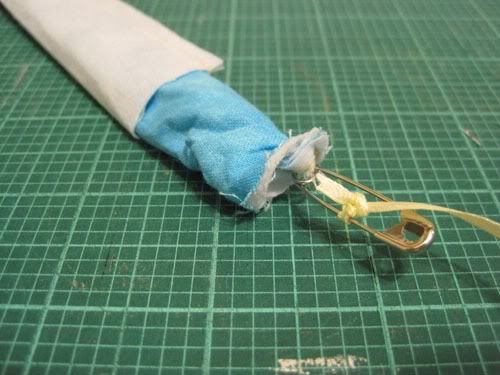
Next, we need to prepare the collar and leash. Back a 2.5" x 24" piece of fabric with fusible interfacing and press in half and stitch down the open end.
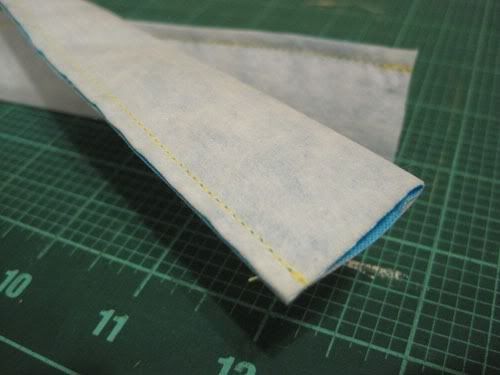
Turn. You might need to enlist some dirty tricks to make it work. Press.
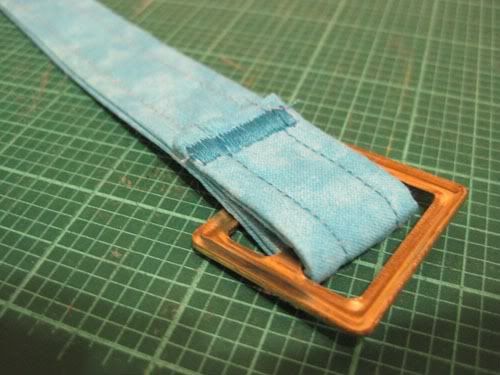
Fit the fabric around the neck and through the buckle to figure out how long you need to make the collar. Make sure to leave enough to fold and sew the attachment point and then enough to easily fit through the buckle. If I recall correctly, my measurement was 9 or 10 inches.
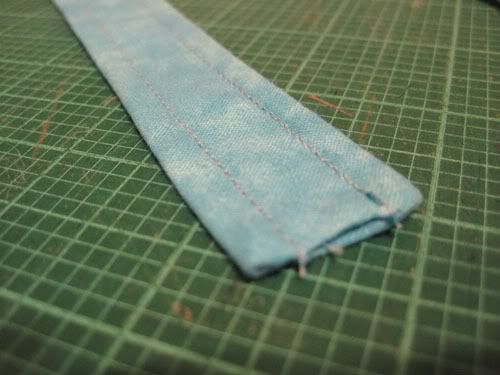
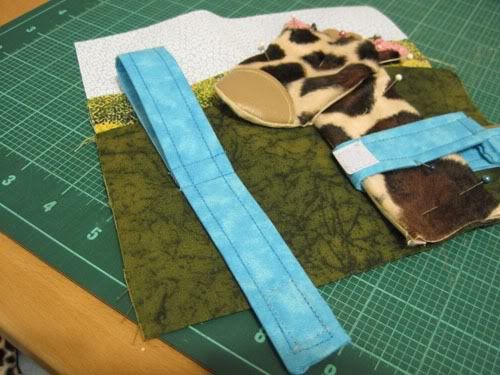
Tuck in the ends and topstitch.
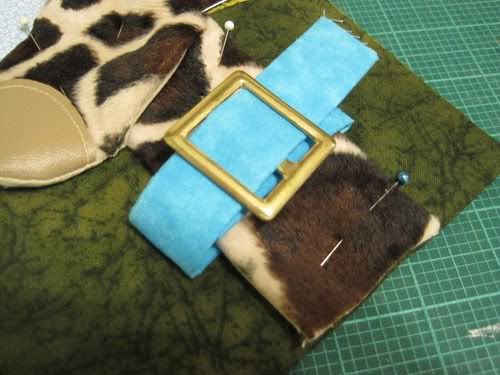
Securely attach the hardware.
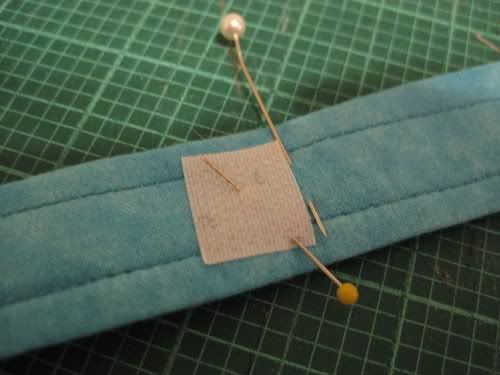
Position the collar around the neck, buckle, and then mark the free area on the left hand side. This is where we will attach our velcro "connector".

Set this aside for now.
Prepare the leash by looping over one end a nice amount and then figuring out how much more fabric it'd take to reach the connector. Make sure to leave room for the wording at the top.
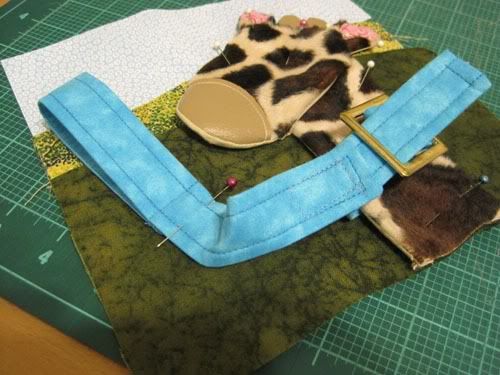
Stitch the loop down and then secure the velcro on the collar and then another piece on the leash. Stitch the leash down to the page.
Topstitch the giraffe, starting with the neck portion.
Add wording and eyes, and you're done!
Thought this was fun? Just wait for the next page and while you're at it, be my fan!


No comments:
Post a Comment