As with gifts in the past, this shower invitation came with the assignment of "bath time!" As someone who hasn't been bathed in the kitchen sink for 26-some-odd years, I had to put on the thinking cap for this one. I do, however, have some semi-recent experience in the department with supervising the hosing down of my little brother, who turned twelve this past weekend. Not too terribly recent, but I don't think that the mechanics of bathing have evolved much in the past ten years.
One thing I DO remember is how much Alex (my brother) enjoyed just having time to splash and play in the tub once he got to the "sitting comfortably" age in a regular tub (9 months? Mom?). It was so cute watching him squeal and enjoy his time, and making little shampoo mohawks with his curly hair. Letting him play, of course, meant some boredom on my part because you can't take your eyes off a kid in the tub for even a second. His bath toys weren't terribly fun for me, the teenager, with the exception of a plastic frog that has been repurposed under questionable intentions. So yeah, there was a lot of sitting and watching and boredom (and rinsing out mohawks before the shampoo got into his eyes).
With that in mind, I thought it pertinent to create something that could make bath time a little more interesting for everyone involved. The possibilities were somewhat limited because whatever I made had to be water-friendly, useful, and not take up a lot of space in the drier times of the day. But, after some noodling I figured out my main gift - terry cloth bath puppets that can double as wash cloths.
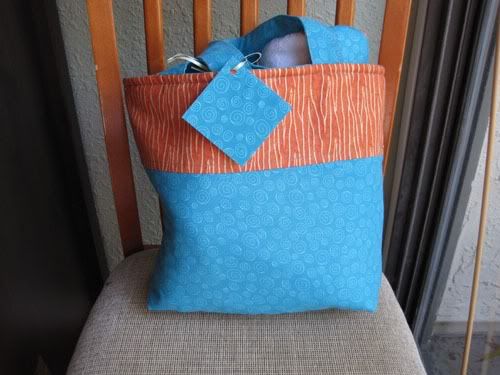
Initially, I was going to make a huge assortment of critters but time was just not on my side with this project, having only a week to complete it. But, I supplemented the gift with some other nice things, including a twist on this and my now standard finger puppets and tote bag.
The first part to creating these terry puppets was to develop the pattern. As I do with almost all of my projects, I started out on paper by drawing out the rough idea of my finished product.
I often use this part of the process to develop the HOW of what I'm doing. Quite often, it is here that I identify problematic situations and paper is far cheaper than a ruined cut of fabric :) And, on occasion, I build paper mockups too!
Once I had an idea of how I wanted to do these, I got a tracing of my hand into the computer to have some dimensions to work from. From there, I developed a basic "mitten" that all my patterns were eventually based off of. This mitten accommodated an adult hand and allowed the thumb to be held in a comfortable position. The trick was making the thumb space a design element. And, I made them somewhat roomy so said adult hand could scrub baby down comfortably.
Next, materials had to be sourced.
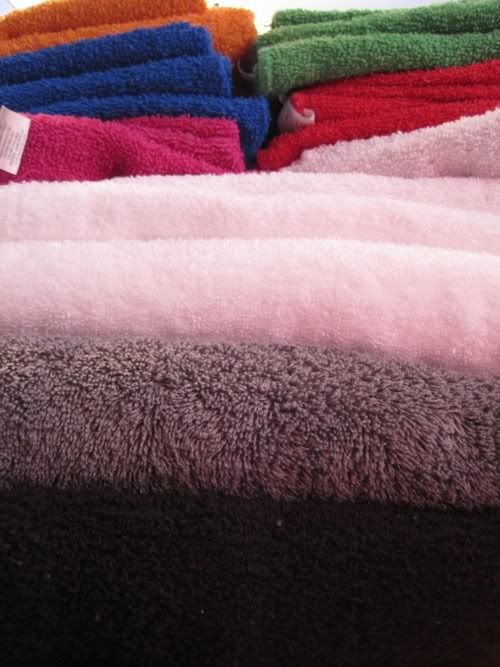
Terry cloth is available in a variety of colors at the fabric store...starting at $6/yard. Ouch. Nope, we need to figure something else out. Walmart to the rescue! I actually found it a bit cheaper to buy towels and hack them up. And, you have access to a lot more colors this way. A nice bonus was that my Walmart has been in the process of being "supercenterized" for the past few months and clearance items have been plentiful as they need things out of the way. I scored some bath towels for like $2.50 each. And, these for $4 (actually bought another pack for $3 over the weekend).
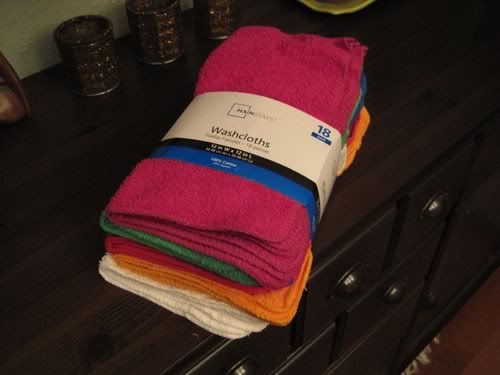
The $2.50 towels are actually the best bet here - thin terry cloth is far easier to work with, but the better towels sure do feel nice... But the gist of the story is to keep an eye out for sales and remnants - there are certainly some deals to be had!
And while I'm at it, kiss goodbye to clean floors for a week. I'm still cleaning terry fuzz up a week later.
Before doing anything, give those towels a good wash and dry to get any sizing, shrinking, and loose dye out of their system. Very very important.
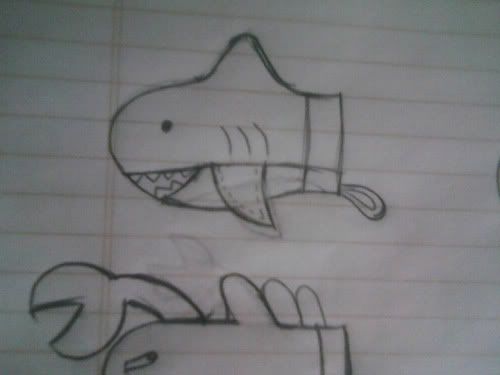
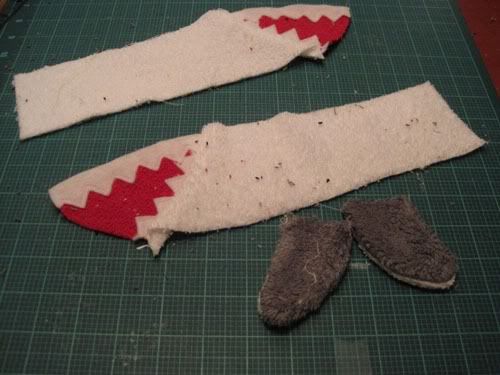
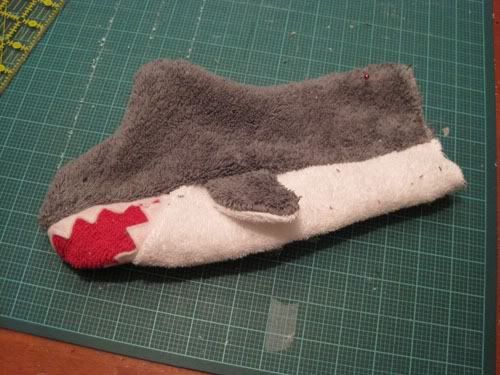
Using the patterns I developed (here is the shark), I cut out all the needed pieces. It's not shown, but the fins need an "inner side" as well.
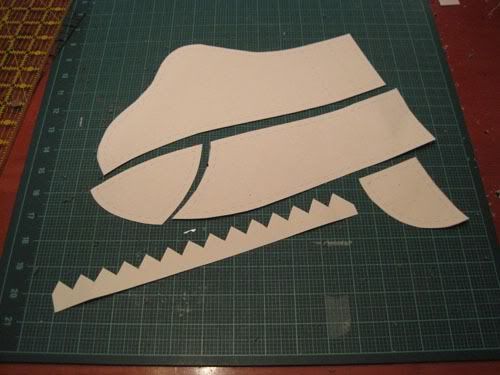
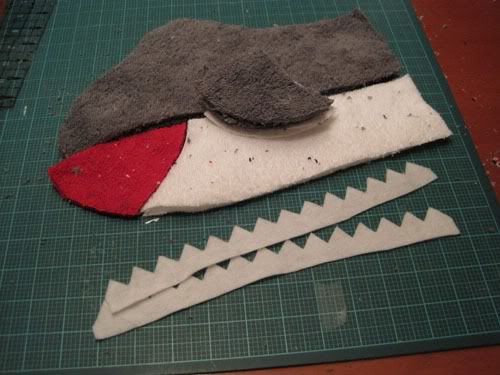
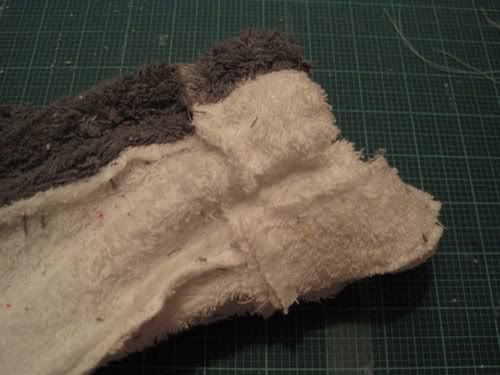
You can see the difference between the gray terry and the rest of it here - couldn't find a basic gray towel and had to get a nicer one.
The way these patterns work is in halves - almost like a fabric oven mitt. So, the process starts with building up those halves. Here I've installed the teeth (these were felt):
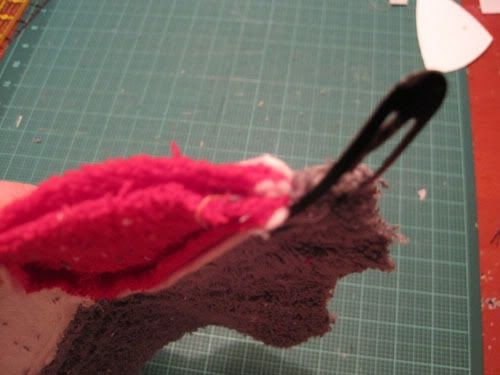
I found hair clips and bobby pins to be quite good at pinning layers together with virtually no shift.

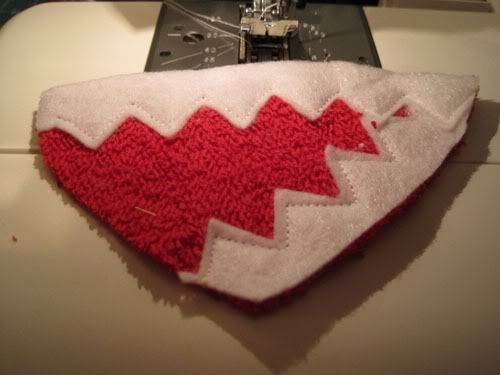
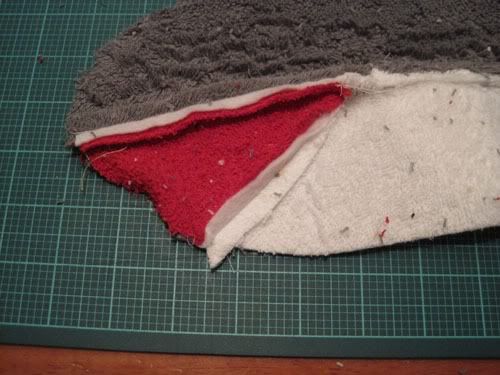
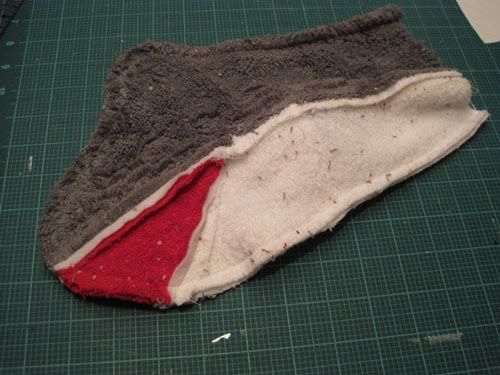
Then, those mouth pieces get built into the belly and body. Notice I've used the seam of the gray and white to be a convenient place to insert my fin.

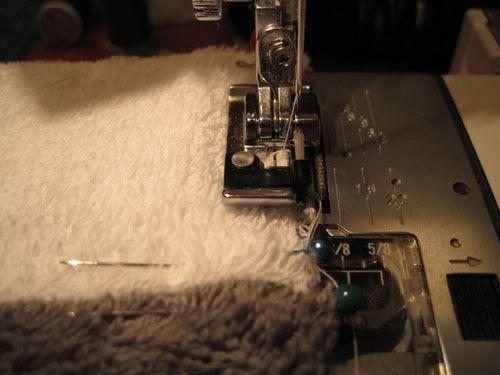
The next thing to do was sew the halves together. I had far better luck pressing the seams open to keep the seam even and my machine happy.
Pin/clip/whatever all the way around, starting at the seams that must be lined up perfectly.
That gets you something that looks like this.
Finish the seams - I used a "double zigzag stitch" as suggested by my machine's manual. I found it worked quite well (handy that manual!).
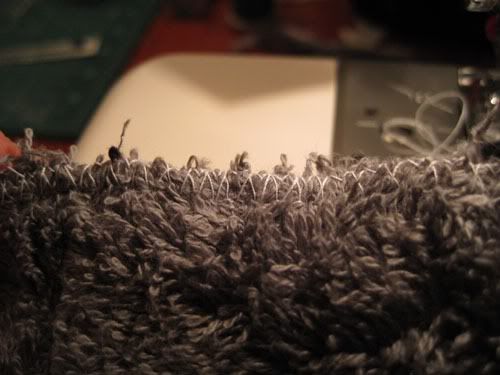
Turn and press.
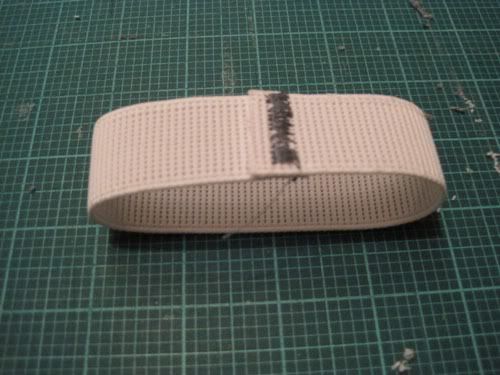
Turn it back inside out and sew a wrist-sized round of elastic into the cuff. For best results, size this elastic to stretch comfortably around your sewing machine's free arm. That way you can just slide the opening of the terry puppet over and topstitch the elastic's channel in. The elastic is in there to keep it from sliding off your hand while bathing your baby, and while this mitt is definitely going to be too big for a toddler's hand, the elastic will help somewhat to keep it on his/her hand too.
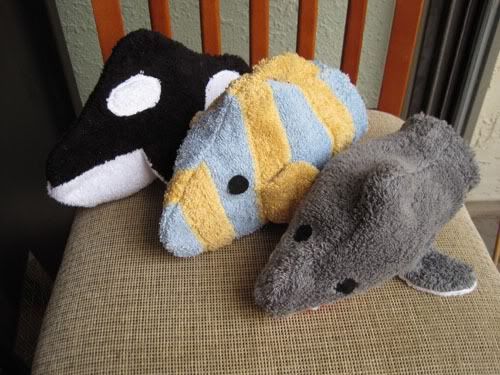
Turn and press again, and give it a good shimmy shake to get all the fuzz off. With some tinkering you can create all kinds of interesting patterns. You might notice that I created the killer whale and fish by layering the terry on top of the base fabric - all you have to do for this is topstitch it on using your machine's recommended stitch. Easy peasy!
Don't forget to add the eyes!
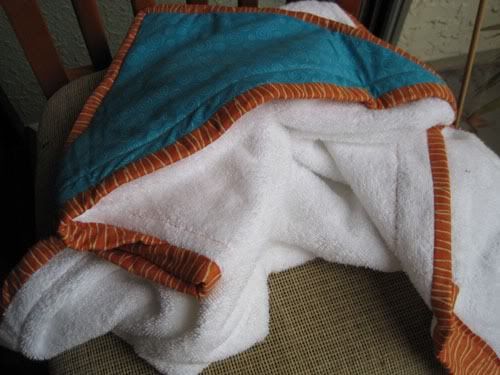
My twist on the hooded towel was that I used wider binding and, not really knowing what I was doing, didn't round the corners and treated it like a quilt binding. I had great luck with just buying a decent bath sheet for the backing. It's tons nicer than fabric store terry and was just the right width. And, with the addition of the binding and a terry lining in the hood, this towel ended up having a very nice weight and feel to it. Definitely something I'd want to use to wrangle a baby with!
Add a coordinating tote bag and crochet puppets and it's a gift!
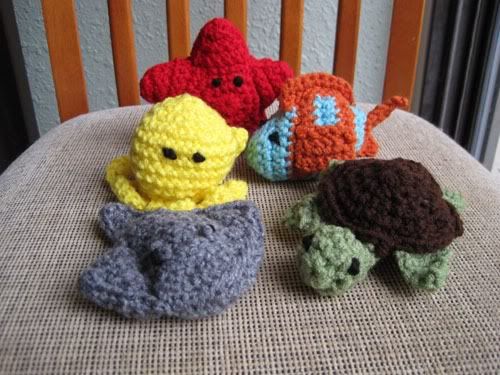

I actually ran into this friend and her husband today and her husband said he LOVED the hand puppets and could not find them in any store. It is so nice to make gifts that people truly appreciate!


You are just getting too creative! I love the hand puppets and I bet mom will have a great time cleaning baby! Nice job on the bath towel, which were my favorite for my little guys! You have very lucky friends!
ReplyDeleteMichelle, you continue to amaze me! I'll be able to hand over my "Queen of Everything" title to you before too long! :D
ReplyDeleteYeah, but you can do math. I can't.
ReplyDeleteI'll do your math.. :D
ReplyDeleteSeriously Michelle you are too AMAZING!!!! I'm just in awe of your creativity. Keith and I cannot wait to use them. We are so lucky to have you for a friend!!!! :0)
ReplyDeleteAWESOME!! Those are fantastic. You have a blog award waiting for you at my blog. :)
ReplyDeleteKelsey
I can't find it, Kelsey! D:
ReplyDeletenice blog my friend ,,this is my first time i visit your site ...hope i'll learn much about information on your site..regards
ReplyDelete